


Pull-Up Bar Buying Guide
Performing pull-ups naturally requires a good pull-up bar. On this page, you will find everything you need to know about buying a good pull-up bar. If needed, and so you don't have to search long: behind the following link you will find all pull-up bars from klimmzugstangen.de.
Choosing the right pull-up bar
All in all, choosing a pull-up bar today leaves you spoilt for choice. This is especially true for home pull-up bars. Pull-up bars are available for almost every conceivable mounting location, in widely varying qualities and price ranges. Pull-up bars are also available as separate fitness equipment or in combination with other training devices.
At home in your own apartment, pull-up bars are frequently used as standalone fitness equipment since they require significantly less space. Most commercial gyms, however, have a pull-up bar firmly integrated into a power rack.
Only buy a pull-up bar that doesn't need to be constantly assembled and disassembled
It happens quite often that a new piece of fitness equipment ends up under the bed or in the broom closet after a few months. Often because setting up and putting away the equipment is so annoying that many quickly lose their desire to train.
For this reason, you should always buy a pull-up bar that can remain at its mounting location after installation and use. This is the only way to avoid the annoying setup and teardown process and maintain your motivation.
If you don't have your own fitness room or fitness corner, the pull-up bar should always be mounted within easy reach. The study, bathroom, hallway, or even the living room are well suited for this. Basically, any room that is used at least once a day.
Furthermore, every pull-up bar should be mounted in such a way that you don't have to bend your legs when performing pull-ups [1]. Any bending of the legs diminishes the training feel, which negatively impacts motivation.
Depending on the mounting location, this naturally means the pull-up bar should be mounted higher rather than lower above the floor. If the pull-up bar is mounted in the living area, it should also look visually appealing or at least fit into the room in terms of dimensions.
Tip: The tube diameter of the pull-up bar should always be 30 mm. Smaller diameters cut into the hands when doing pull-ups. Larger diameters offer a poorer grip.
Always choose the mounting location with the greatest possible clearance
A pull-up bar can be mounted on a ceiling or a wall. It can also be mounted in a hallway, in a corner, on a beam, or outdoors on a balcony.
Pull-up bars can also be attached to door frames and door casings. Note, however, that a door is the worst mounting location for a pull-up bar!
Ultimately, the choice of a pull-up bar depends on the available space and your budget. Fundamentally, your mounting location should offer the greatest possible clearance. Therefore, for example: A ceiling pull-up bar should always be mounted in the middle of the room. This also means that ceiling mounting is always better than wall mounting. Reason: Ceiling pull-up bars, regardless of their design, always offer twice the clearance of a wall pull-up bar.
Otherwise, every pull-up bar must be firmly and securely connected to its mounting location. Pay attention to the stability of the mounting location, the appropriate dowels and screws, as well as the maximum load capacity of the pull-up bar.
Buy a multi-grip pull-up bar if possible
With almost all mounting types, you can choose between pull-up bars with few or multiple grips. The simplest pull-up bars feature a 110 cm long straight or bent tube without any other grip options. Such pull-up bars meet the most basic requirements. However, multi-grip pull-up bars are better.
Multi-grip pull-up bars are pull-up bars that have at least additional grips on the tube, often referred to as parallel grips. With such pull-up bars, significantly more muscles can be trained. In addition, multi-grip pull-up bars offer more variety during training.
The training feel on parallel grips is very comfortable. Especially the parallel grips, which are attached shoulder-width apart at a distance of approx. 60 cm on the tube, are worth every penny. Anyone who has trained on such additional grips will never want to go without them again.
Mounting a pull-up bar - What are the specific mounting locations?
Ceiling pull-up bar
If ceiling mounting is possible, it should definitely be utilized. Ceiling pull-up bars offer maximum clearance and enable all possible pull-ups and exercises. However, to ensure this type of mounting doesn't result in any surprises, pay attention to the optimal mounting height.
The optimal mounting height is achieved when hanging from the pull-up bar with fully extended arms, your legs do not touch the floor. Generally, this is met if, standing on your tiptoes with arms extended, you can just barely touch the tube of the pull-up bar with your fingers. Furthermore, there should be a distance of at least 27 cm between the tube and the ceiling so that your head does not hit the ceiling when pulling yourself up.
The optimal mounting height is very important for the training feel. Keep this in mind, dear reader, if you want to build a pull-up bar yourself.
 |  |  |
|---|
Wall pull-up bar
If mounting on the ceiling is not possible, the pull-up bar should be mounted on the wall. With this type of mounting, in addition to the distance from the wall (at least 30 cm), the distance to the ceiling (at least 27 cm) must also be considered.
When mounting the pull-up bar above a door, the distance to the wall can also be smaller (at least 15 cm). Otherwise, if possible, the pull-up bar should always be mounted on the wall above the door. This provides a bit more clearance.
 |  |  |
|---|
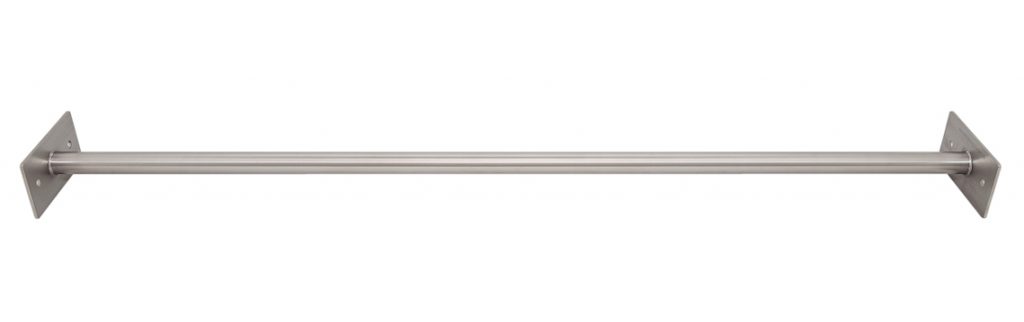
Hallway pull-up bar (Wall-to-wall pull-up bar)
If mounting on the ceiling or a wall is out of the question for structural or financial reasons, or because you only want to do simple pull-ups, the pull-up bar should be mounted in a hallway.
A hallway pull-up bar is only possible if the hallway width is less than 1500 mm. Additionally, such a pull-up bar must always be custom-made, as every hallway has an individual width.
Tip: If the width of the hallway is measured correctly as we specify, your pull-up bar will sit "rock solid".
 |  |  |
|---|
Pull-up bar for a wooden beam
If beams are available in the house or apartment, they can also be used to mount the pull-up bar. The beams should, however, be sturdy.
Generally, pull-up bars can be mounted on a beam from above, from below, or from the side. Mounting the pull-up bar between two beams is also frequently feasible.
As a rule, beam pull-up bars are mounted on the side of the wooden beam. Otherwise, the mounting depends on the individual circumstances.
 |  |  |
|---|
Hanging pull-up bar (using ropes, straps, or chains)
Hanging pull-up bars offer a very simple way to do pull-ups. A ceiling or a beam can serve as a suspension point for such horizontal bars. These bars cannot be attached to the wall unless an appropriate bracket is mounted on the wall.
The connection between the pull-up bar and the suspension point is made using a rope, a strap, or chains. These must be sufficiently stable and match the anchor points on the ceiling or beam.
Eyebolts are very well suited as anchor points. However, their eye is often only suitable for ropes. For straps and chains, a bracket with a correspondingly large eyelet is usually used.
The training feel with hanging pull-up bars is worse than with firmly mounted bars. Such pull-up bars always swing slightly during use, which can be somewhat distracting. Conversely, the training effect is better because, in addition to the strength needed to pull yourself up, strength must also be applied to stabilize the bar.
Tip: Hanging pull-up bars can be adjusted in height very easily with the right ropes, straps, or chains. This means such a suspension allows for normal pull-ups, lying pull-ups, or push-ups on the pull-up bar, depending on the set height.
 |  |  |
|---|
Handles (Holme) for the wall or beams
Another simple way to perform pull-ups is offered by handles protruding into the room. These are simple grips that can be attached either to the wall or to a wooden beam. In a strict sense, these handles are not a pull-up bar because they do not have a tube running parallel to the shoulder line. The grips are usually 30 cm long. They are ideal for very simple exercises or for stretching the back. The handles are available with a fixed or variable distance.
Tip: Always mount the handles shoulder-width apart on the wall or beam, then the pull-ups will feel the best.
Pull-up bar for doors, door frames, door casings
Pull-up bars for the door, door frame, or door casing should only be chosen if all other options are definitively out of the question. Door pull-up bars are very unsafe, leave signs of wear and tear on the door casing, and overall create very poor conditions for effective and successful training.
For one, your legs must always be bent on such pull-up bars to be able to do pull-ups at all. For another, such pull-up bars must be constantly assembled and disassembled. Both become annoying in the long run. That's why such pull-up bars end up under the bed or in the basement quite quickly.
You can save the money and time spent buying a pull-up bar for the door, door frame, or door casing. But please, dear blog visitor, experience it for yourself if you choose not to follow this recommendation.
All in all, which pull-up bar is recommended?
Once the intended use of the pull-up bar is determined, the choice of the pull-up bar depends on the space available on site and your own budget.
Here are our favorites for normal requirements. A quick overview of our models can also be found in our Pull-up Bars Quick Guide.
For ceiling mounting, we recommend the pull-up bar D4
The pull-up bar D4 is our all-rounder with the most grip variations and maximum clearance. This model should definitely be chosen if the ceiling is available as a mounting location.
The D4 model offers the largest usage radius and the greatest training variety of all pull-up bars. The D4 has a total of three different pairs of grips for maximum variety during training. The 30 mm diameter of the horizontal bar is also ideal. If the D4 is mounted in the middle of a room, it can be used from all sides.
Grip options on the pull-up bar D4: (1) bent horizontal bar with a maximum grip width of 110 cm, (2) wide parallel grip (= spoke grip) with a grip width of 60 cm, (3) narrow parallel grip with a grip width of 23 cm.

If the D4 model exceeds your budget, we recommend the pull-up bar D2. If the pull-up bar D2 is also too expensive, the pull-up bar D1 is a good choice. If the D1 is also ruled out for price reasons, our L or E models should be considered.
For wall mounting, we recommend the pull-up bar W4
If only the wall is available as a mounting location, we recommend the pull-up bar W4 - our top model for walls. It offers the greatest variety of all wall pull-up bars. The W4 model has a total of three different grip options: (1) maximum grip width on the bent tube of 110 cm, (2) wide grip option on the 60 cm wide parallel grip, (3) narrow grip option on the 23 cm wide parallel grip.

If the W4 model is priced too high, we recommend the pull-up bar W2. If the price of the W2 model is also outside your budget, we recommend the W1. If the price of the W1 is also too high, then our L or E models should be considered.
For hallway mounting, we recommend the pull-up bar E2
The pull-up bar E2 is our top model for the hallway. It only offers one grip option along its length, but it is highly stable and ideal for simple exercises. This model is definitely recommended if ceiling or wall pull-up bars are out of the question for technical or price reasons. The E2 pull-up bar can also be used for kipping and butterfly pull-ups (CrossFit pull-ups) in rooms with sufficient height. All types of abdominal exercises (like crunches with bent or fully extended legs) are also possible on the E2 without any problems. The length of the E2 model must always be adapted to the individual hallway width. In return, it is completely inconspicuous in the room.
Tip: As an alternative to the E2, we also offer the pull-up bar for a 90° corner (the E1 model) and a removable version of the pull-up bar E2 (the E4 model). However, we only recommend these pull-up bars if the E2 cannot be installed for technical reasons or if removing the tube is absolutely necessary.
References
[1] Perfect height of a pull-up bar: formula for calculation, klimmzugstangen.de - Guide